

Investment Cast Ring/Pendant
November 2019
In this project, I used Formlabs castable wax resin to make a highly detailed investment cast ring that I later beaded onto a necklace.

Solidworks Model
I first designed my ring in Solidworks taking inspiration from the phases of the moon. I made sure to design the ring with the intent to add sprues in the Solidworks tree model (that would later be added to this model) to ensure that pewter would be able to flow into all of the nooks and crannies of the model that will be within the investment mold.
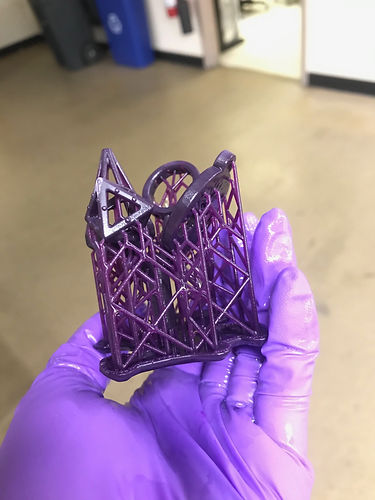
Printing the Tree in Castable Wax Resin
My ring design was incorporated onto a tree inhabited by other designs made by my group members. If you look at the ring in the back of the photo, you can see the sprues that were added onto my ring that will provide a path for easy flow of pewter into the design within the investment mold.

Creating the Investment Mold
The castable wax tree is placed into a cup filled with plaster that was vacuumed to ensure that no bubbles existed inside. The plaster was dried completely overnight, and then heated in a kiln to melt out the castable wax design. After the wax was melted away, negative space corresponding to the design exists within the plaster, leaving a mold for the pewter to flow into.

Pouring the Investment into the Plaster Mold
The pewter is heated to its melting point in a pot, and is quickly poured into the plaster mold. Once finished, the cast is left to set overnight.
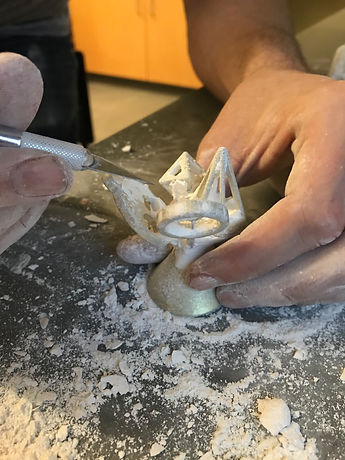
Chipping Away at the Plaster
The plaster is chipped away at carefully as to not break any of the delicate geometries inside. Small mallets are used to get the bulk of the plaster off, and then exacto knives and brushes are used to get the plaster out of the details within the parts.
Pewter Cast Product
Once all of the plaster is taken off of the pewter cast, the rough cast shown below is what was revealed. The next steps include sawing the individual pieces off of the tree, sanding the parts down for smoothness, and using a dremel to achieve the intended surface finish.


Final Ring
The image at the right shows the ring after it has been removed from the tree and finished off using the dremel and sanding tools. The surface is shiny and the details came out great.

Final Beaded Necklace
I made the ring into a pendant by using wire, beads, and jewelry tools such as pliers. Once the pendant was complete, I simply strung it onto a piece of stretchy plastic wire and beaded it up using a design I liked. I finished off the ends with a clasp.